
A buyer scrolling listings gives your property about a second and a half. One thumbnail, one decision: open it or keep scrolling. Everything you have done on pricing, staging, and positioning gets filtered through that single frame.
Most agents know this. Fewer have a system for it. Photography gets booked, the photographer shows up, the gallery arrives two days later, and whatever is in it is what goes live. The listings that consistently perform tend to come from agents who treat the shoot as something they direct rather than something they order.
Here is the shot list we work from, along with the parts that happen before and after the camera comes out.
Before the photographer arrives
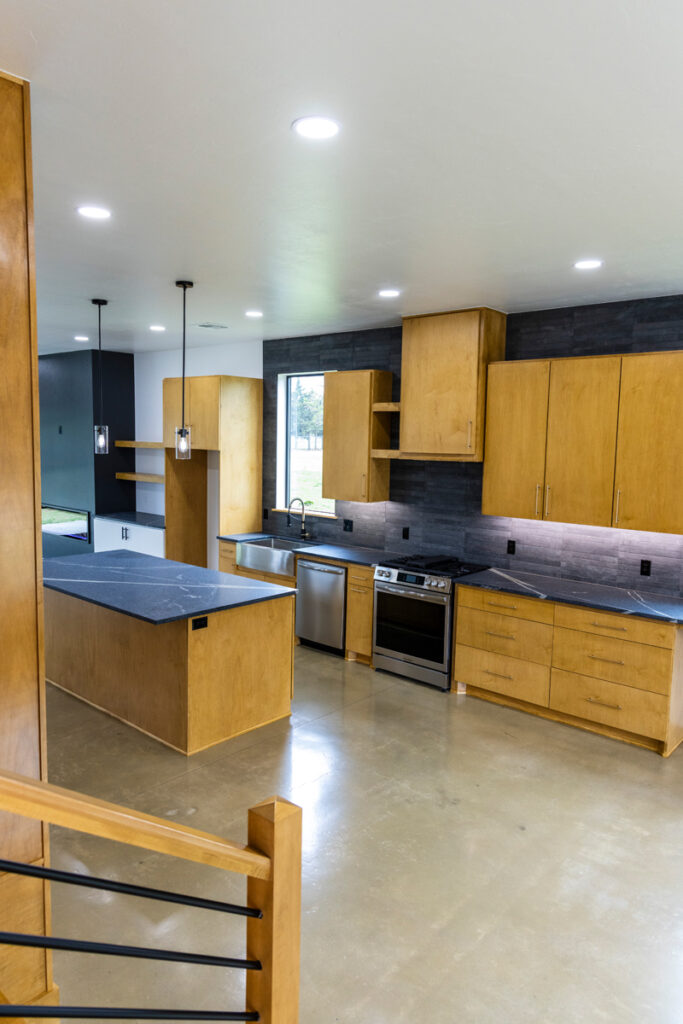
Prep does more for the final images than any piece of equipment. The National Association of Realtors publishes ongoing research on buyer behavior that consistently puts photos among the most valued features of a listing site, which makes the hour spent preparing the house a high-return hour.
Clear every surface. Kitchen counters down to one or two intentional objects. Bathroom counters completely empty. No dish soap, no toothbrush cups, no sponges. Remove the sink mats.
Depersonalize selectively. Family photos, refrigerator magnets, prescription bottles, mail, kids’ artwork. The buyer needs to picture themselves living there, and it is harder when they are looking at somebody else’s life.
Every light on, every bulb matching. Mismatched color temperature between bulbs is one of the most common and most fixable problems in listing photography. A room lit half warm and half cool is a nightmare to correct afterward.
Windows and mirrors cleaned. They show every streak at high resolution.
Blinds set consistently. All at the same height, slats at the same angle, across the entire house.
Cars off the driveway and the street frontage. Trash bins out of sight. Hoses coiled. Toys and pet bowls put away.
Toilet lids down. Obvious, universally forgotten.
Check the weather and the sun. A west-facing front elevation photographs badly in the morning. Knowing which direction the house faces determines when you should be shooting it.
The shot list
Exterior
- Primary front elevation. Straight on, slightly off-center, camera at roughly chest height. Vertical lines must be vertical. This is your thumbnail and it deserves the most attention of any shot in the set.
- Angled front three-quarter. Gives depth and shows the lot.
- Entry approach. Walkway, porch, front door. Sets the arrival experience.
- Rear elevation and yard. Buyers want to see the whole footprint.
- Outdoor living. Patio, deck, fire pit, pool, outdoor kitchen. Staged as if someone is about to use it.
- Distinguishing features. Mature trees, shop, garage capacity, gated drive, view lines.
- Twilight exterior for higher-value listings. Interior lights on, sky still holding color. It is the single most effective hero image in real estate photography and it is worth the return trip.
Main living areas
- Two angles per main room, minimum. One from each of two opposite corners. Corners make rooms read as their actual size.
- Living room with sightlines into adjacent spaces, because open flow is a selling point that a tight crop destroys.
- Kitchen wide, showing the full run of cabinetry and the island.
- Kitchen detail, one tight shot of whatever justifies the price. Stone, range, backsplash, hardware.
- Dining space, set if the furniture supports it.
- Fireplace, built-ins, beams, staircase. The architectural features that separate this house from the one next door.
Bedrooms and bathrooms
- Primary bedroom, two angles, bed made properly with the linens pulled tight.
- Primary bathroom, wide plus a detail of the shower or tub.
- Primary closet, especially if it is a genuine selling point.
- Every secondary bedroom, one clean angle each. Empty rooms look smaller than furnished ones, so stage or virtually stage where you can.
- Secondary bathrooms, one each.
The ones that get skipped and shouldn’t
- Laundry room. Buyers look for it and its absence from a gallery reads as a problem.
- Garage, swept and cleared, showing capacity and storage.
- Bonus, flex, and office spaces. Remote work made these decisive.
- Pantry and storage, if generous.
- Mechanicals, if new. A recently replaced HVAC unit or water heater is a real objection handler.
- Neighborhood context, where it helps. Community pool, trail access, park, a good view from the street.
The technical parts that actually matter
Keep verticals vertical. Converging walls are the fastest tell that photos were shot casually. This means a level camera and correction in post, not a wide lens tilted upward.
Do not over-wide. Extremely wide lenses stretch the edges of a room and make spaces look distorted rather than large. Buyers notice the discrepancy at the showing, and it costs you trust at exactly the wrong moment.
Balance the windows. Blown-out white rectangles where the view should be is the most common flaw in amateur interior photos. Proper exposure blending keeps the room bright and the window showing what is outside it.
Keep editing honest. Sky replacement is generally accepted. Lawn recoloring, removing power lines, or editing out a neighbor’s outbuilding crosses into misrepresentation, and disclosure rules on virtual staging vary. Label staged images as staged.
Sequence deliberately. The order is part of the pitch. Hero exterior, then entry, then the strongest interior space, then a natural walk-through, then outdoor living, then the extras. Do not lead with a bedroom.
Deliver at the right sizes. The MLS, your site, a portrait crop for social, and a print-ready version for the flyer. One set of files sized for one destination means someone is compressing or cropping badly later.
Where photos stop being enough
Stills carry the listing, but for higher-value properties and for anything where the floor plan is unusual, motion does something stills cannot. Walk-through video communicates flow. Drone shows the lot, the setting, and the surrounding area in one frame. Both have become expected above certain price points rather than optional, and both are part of how we approach real estate marketing.
The other thing worth saying plainly: listing photography is also agent marketing. Every gallery you publish is a sample of the standard you hold. Sellers comparing three agents are looking at past listings, and the difference between competent photos and excellent ones shows up in listing appointments long before it shows up in days on market.
A practical starting point
If you shoot your own listings, work through the prep list above before your next one. It costs an hour and it will do more for the images than a new camera would.
If you hire it out, send the shot list to your photographer ahead of the shoot along with the three features you most want emphasized. Photographers generally welcome the direction, and it is the difference between a gallery that documents the house and one that sells it.
We shoot interiors, exteriors, and location work across the OKC metro. There are examples in our photography gallery, and you can see the full scope of our photography and video production services. If you want to talk through a listing or build a standard set of assets for your business, get in touch.
More from Design Thumbprint

Unlock Growth with Design Thumbprint’s Full-Service SEO Suite
In today’s digital-first world, your website is often the first interaction a potential customer has…

SEO Isn’t a One-Time Task—It’s an Ongoing Process
Search engine optimization (SEO) is often pitched like a sprint: “Do a quick audit, fix…

SEO vs. Paid Ads: Which Is Right for Your Business (Or Why You Need Both)
When it comes to growing your business online, two of the most common strategies are…
Want this kind of thinking applied to your marketing?
We are a boutique agency in Edmond working with businesses across Oklahoma and beyond. If something here raised a question about your own marketing, ask us directly.
- Call
- 405-766-6169
- info@designthumbprint.com